

Tracking Method
Tracking Method is set to Browser + Server by default, and this is the recommended way to run Snapchat: Upstack loads the Snap Pixel on your storefront and also sends events server-side, and the two copies are deduplicated. If you don’t want to load the Snap Pixel in the browser, switch the Tracking Method to Server. See Tracking Method.
Prerequisites
Before you start, you need:- An active Upstack Data account (sign up)
- Admin access to your Snapchat Ads account (Snapchat Ads Manager)
- Your Snapchat Pixel ID (how to get it)
- Your Snapchat Conversion API Token (how to generate it)
Configuration Steps
1
Sign in to your Upstack dashboard
Sign in to Upstack Data and open the Events Destination page.
2
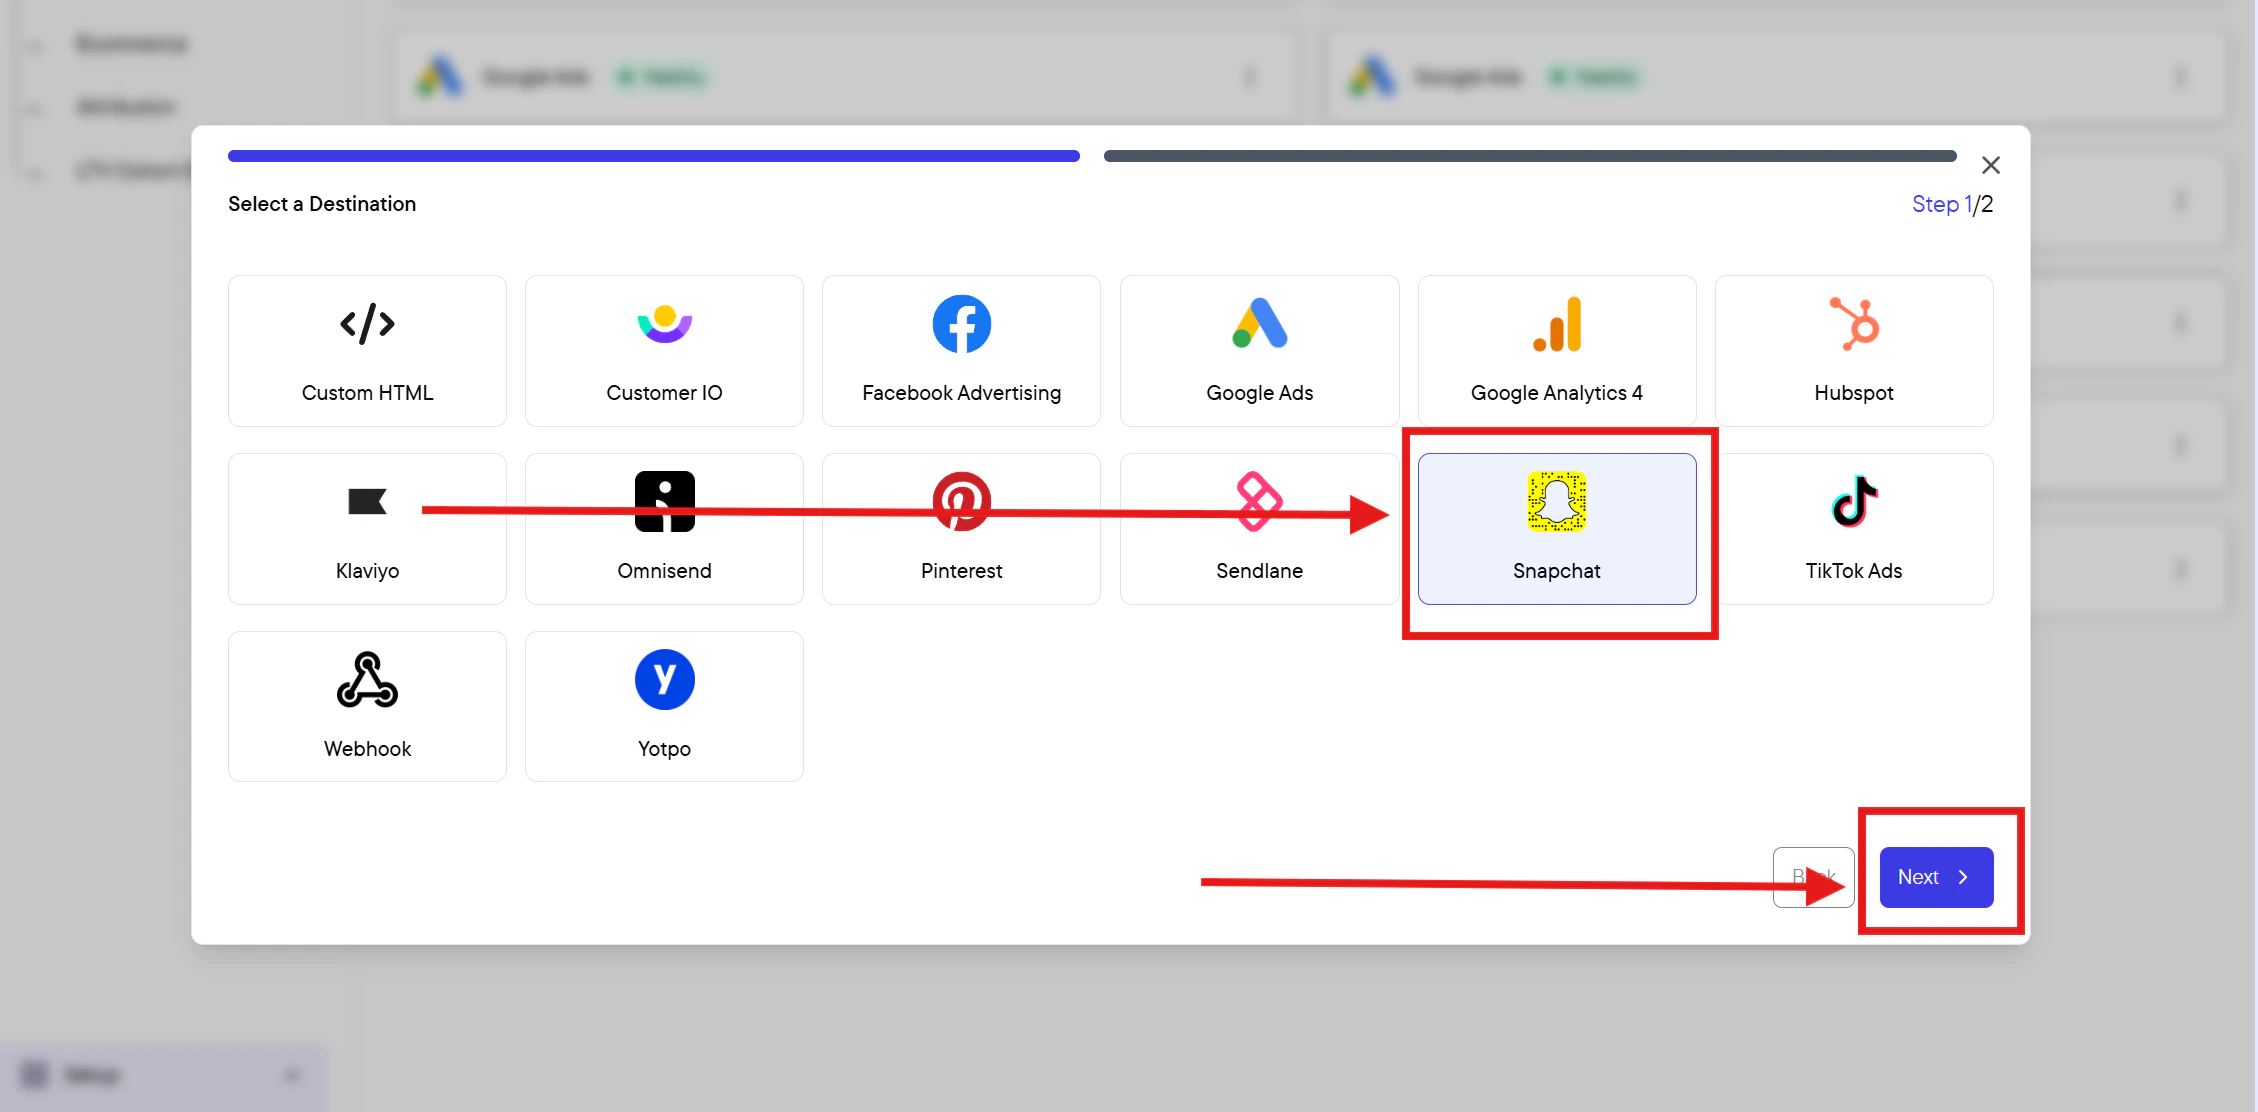
Add a new Snapchat destination
In the Events Destination page, click + New Destination in the top-right of the page.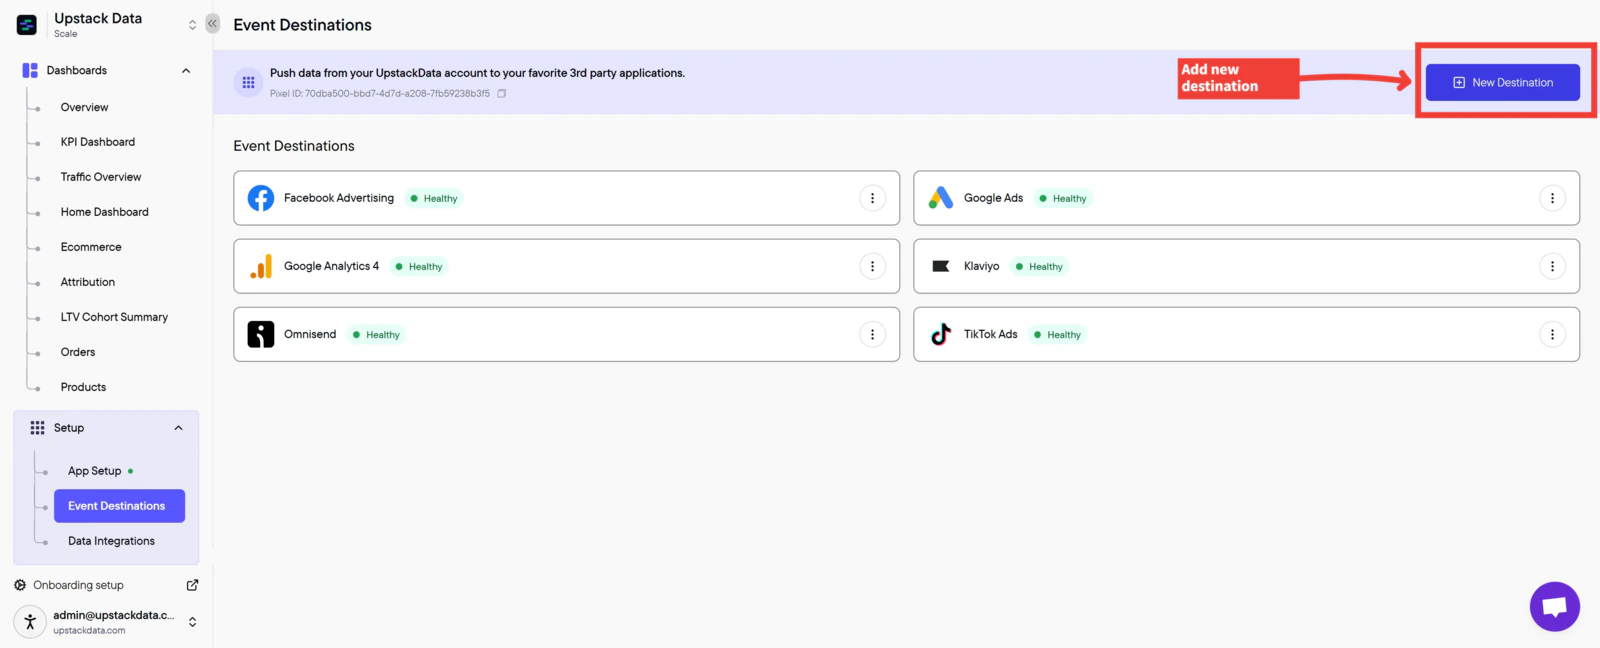
3
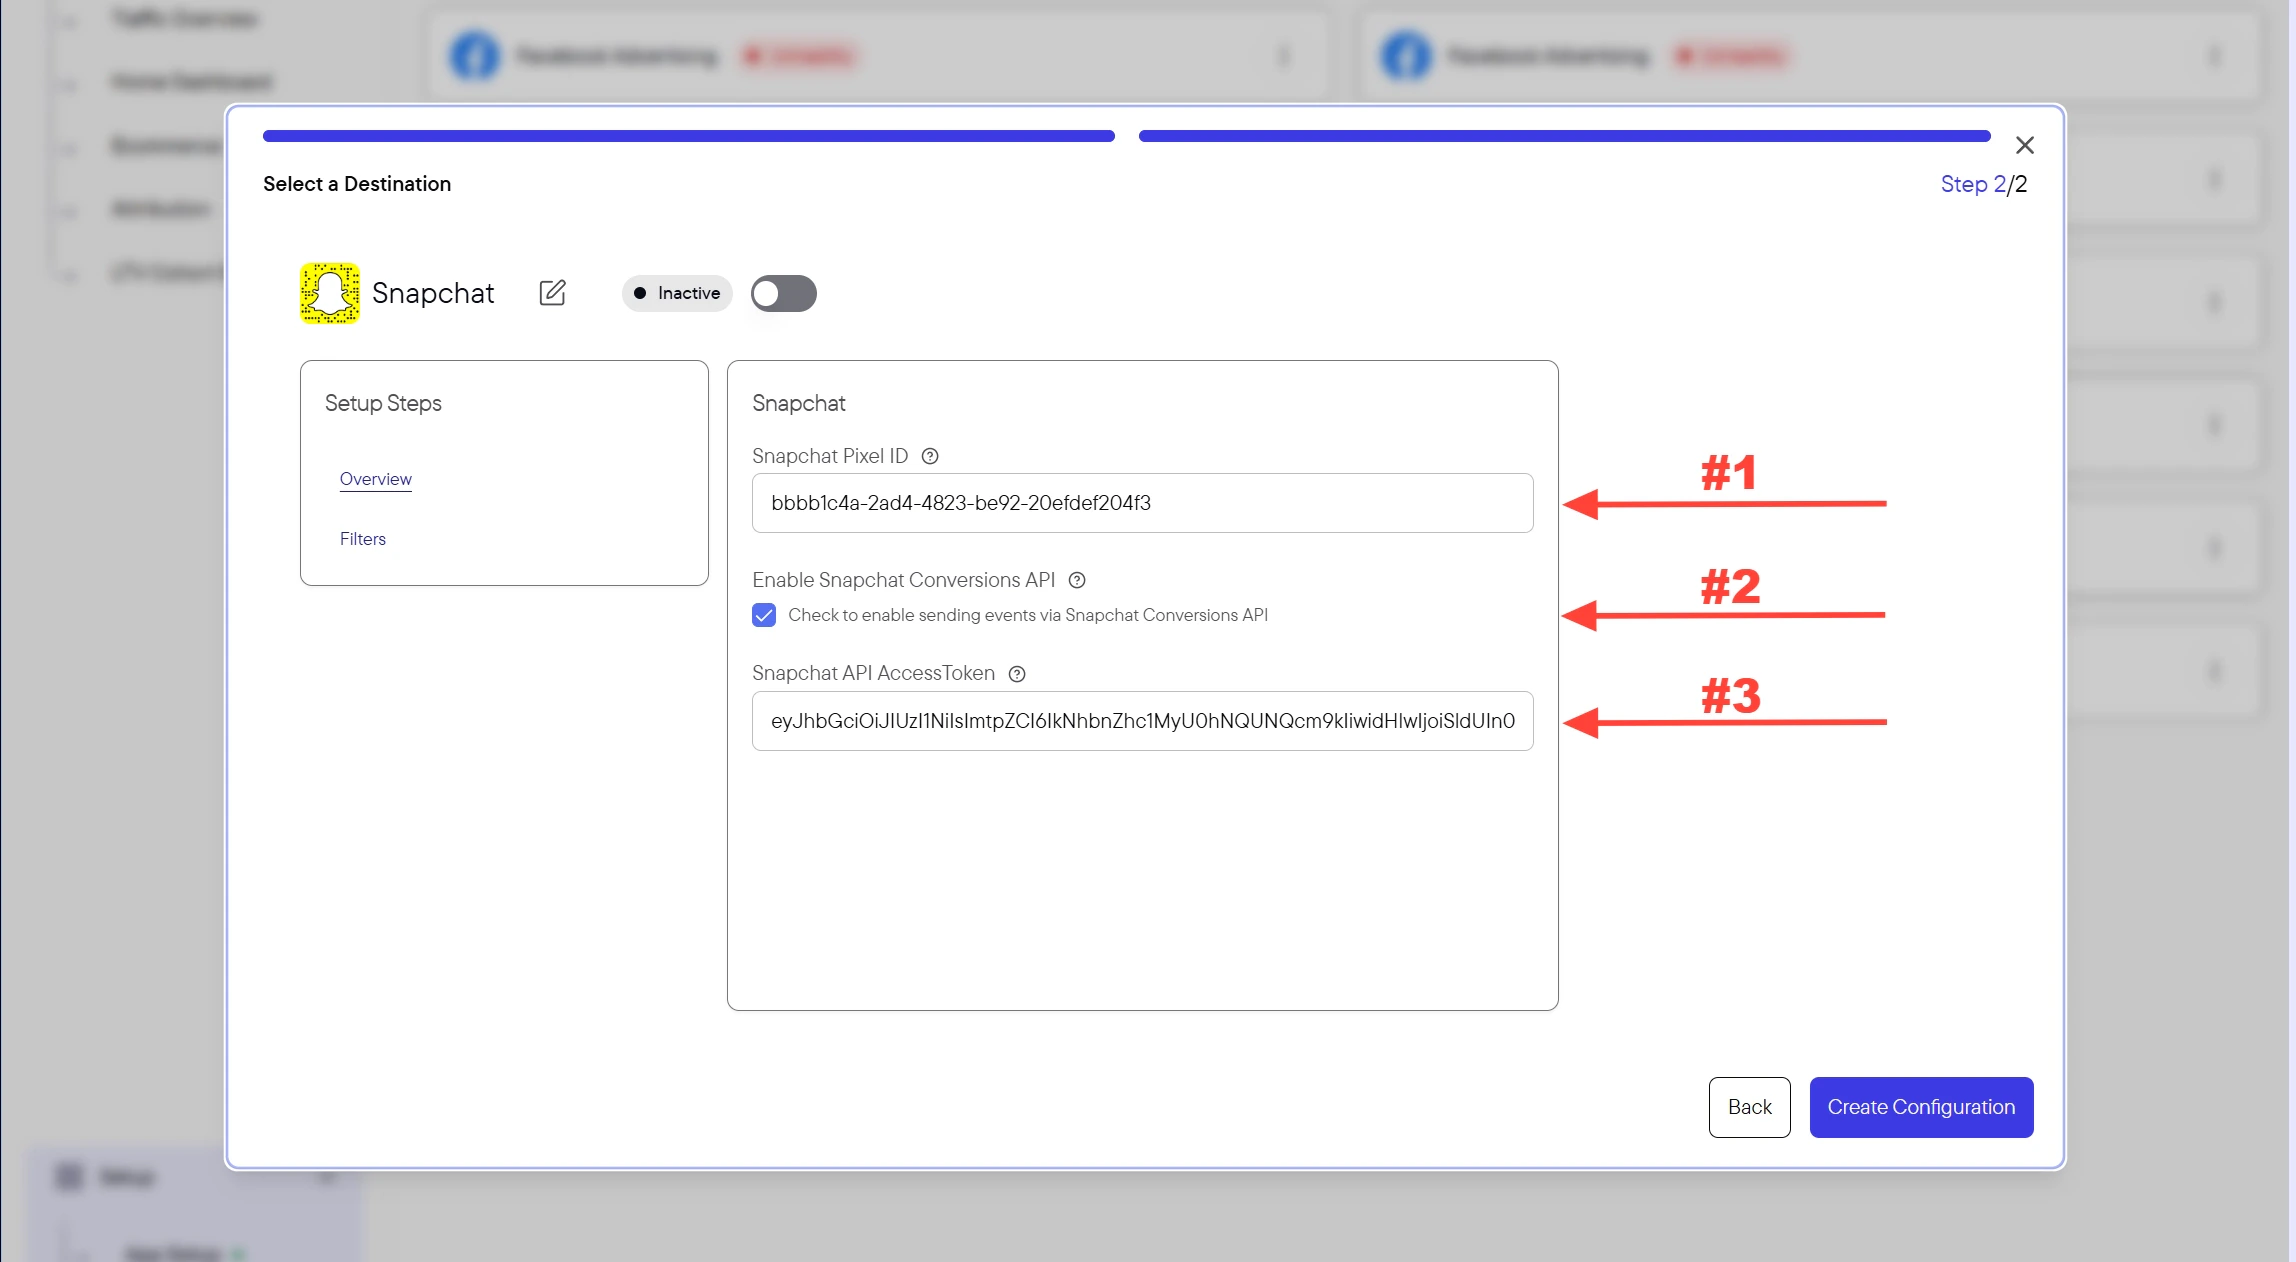
Enter your Snapchat credentials
Fill out the form with the following:
-
Snapchat Pixel ID — a 32-character UUID, for example
00000000-0000-0000-0000-000000000000 -
Snapchat Conversion API Token — the long alphanumeric token (typically 100+ characters) generated in Snapchat Business Manager
Need help finding these?How to Get my Snapchat Pixel ID →How to Generate my Snapchat Conversion API Token →
4
Create the configuration
Click the Create Configuration button at the bottom of the form.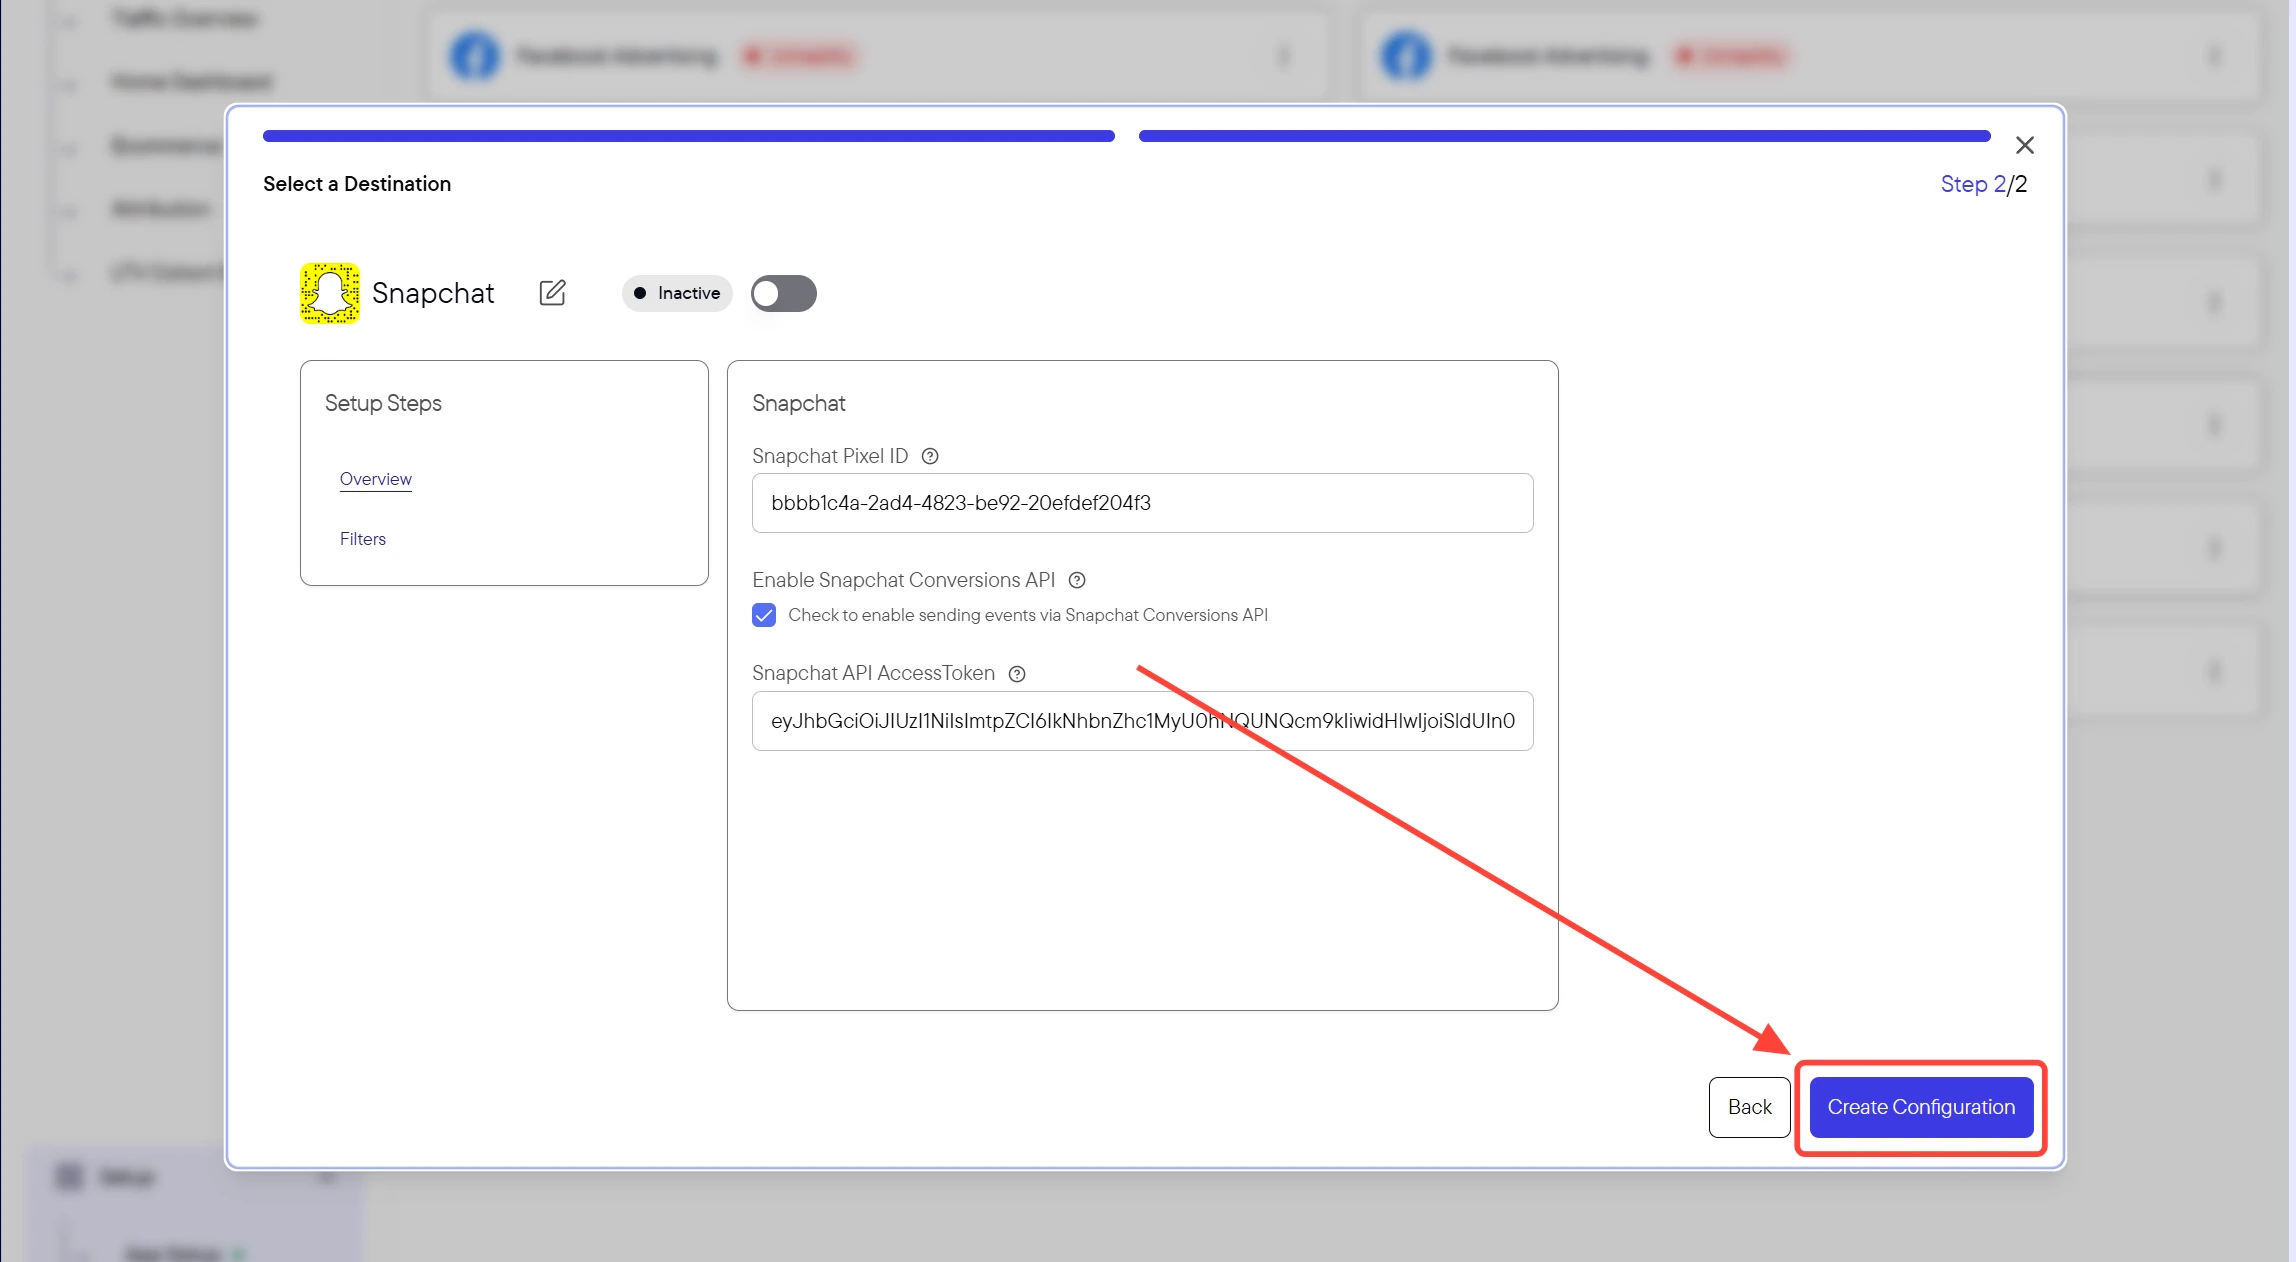
Success! 🎉 You should see a confirmation message and the Snapchat destination will appear as Healthy in your destinations list.
5
Verify the destination is sending events
Back in the Events Destination page, confirm the new Snapchat destination shows a Healthy status.Then, in Snapchat Ads Manager, open Events Manager for your pixel and confirm events are arriving from your Conversions API integration. New events typically appear within a few minutes after a test purchase or page view.